That Frozen Lake Looks Tempting, But Is It Safe? Here's How to Check
Walking on a frozen lake is a magical winter experience, but it's not without its risks. Here's a straightforward guide to checking if the ice is thick enough for your next adventure.
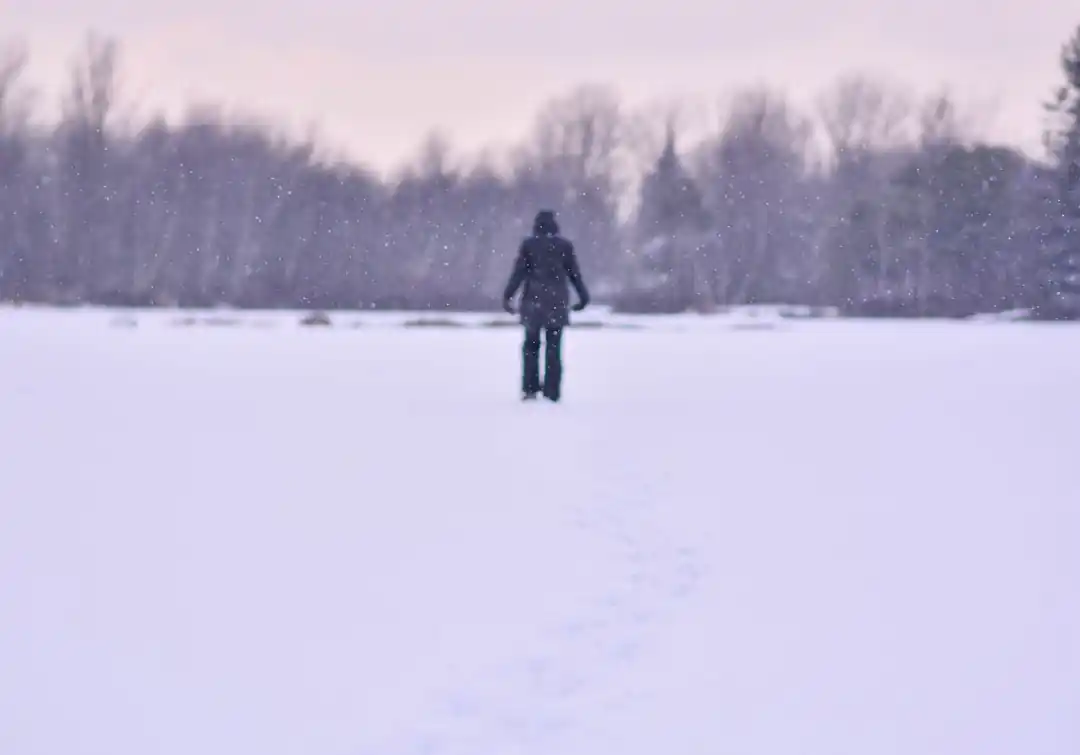
There’s a certain kind of magic that settles over the landscape when a lake freezes solid. It’s a quiet transformation, turning a familiar body of water into a vast, mysterious plain of ice. For anyone who loves the outdoors, the temptation is almost magnetic. You start imagining it: a peaceful walk far from shore, a spontaneous ice-skating session, or drilling a hole for a quiet afternoon of ice fishing. It feels like a whole new world has opened up.
Honestly, I get it. I’ve felt that pull many times myself. That smooth, glassy surface seems to be calling out for you to step on it. But I've also learned (sometimes by watching others make risky choices) that what looks solid can be dangerously deceptive. The difference between a perfect winter day and a potential disaster lies in knowing what’s happening beneath your feet. It’s not about fear; it’s about respect for the raw power of nature.
Before you even think about stepping out, you have to become a bit of an ice detective. It’s a skill, and like any skill, it takes a little knowledge and practice. The good news is that the basics are straightforward and have been passed down by seasoned winter adventurers for generations.
The Science of Safety: It's All About the Inches
First things first, let's talk numbers. While no ice is ever 100% guaranteed to be safe, there are widely accepted thickness guidelines that are crucial to commit to memory. These aren't just suggestions; they're standards developed by departments of natural resources across the US to prevent accidents. The general rule starts with a hard and fast "stay off" for any ice that is less than four inches thick.
According to the Minnesota Department of Natural Resources, a state that knows a thing or two about frozen lakes, the minimum thickness for walking or ice fishing is 4 inches of new, clear ice. If you're thinking about bringing a snowmobile or an ATV out, you need to look for 5 to 7 inches. For a small car or pickup, you're looking at a solid 8 to 12 inches, and for a medium-sized truck, that number jumps to 12 to 15 inches.
It's incredibly important to understand that these measurements are for high-quality, clear ice. If you encounter white ice, also known as "snow ice," you need to double these thicknesses. White ice is opaque because it's formed from frozen snow and water, and it's only about half as strong as its clear counterpart. So, that 4-inch rule for walking becomes 8 inches if the ice is white.
Reading the Ice: Visual Clues to Look For
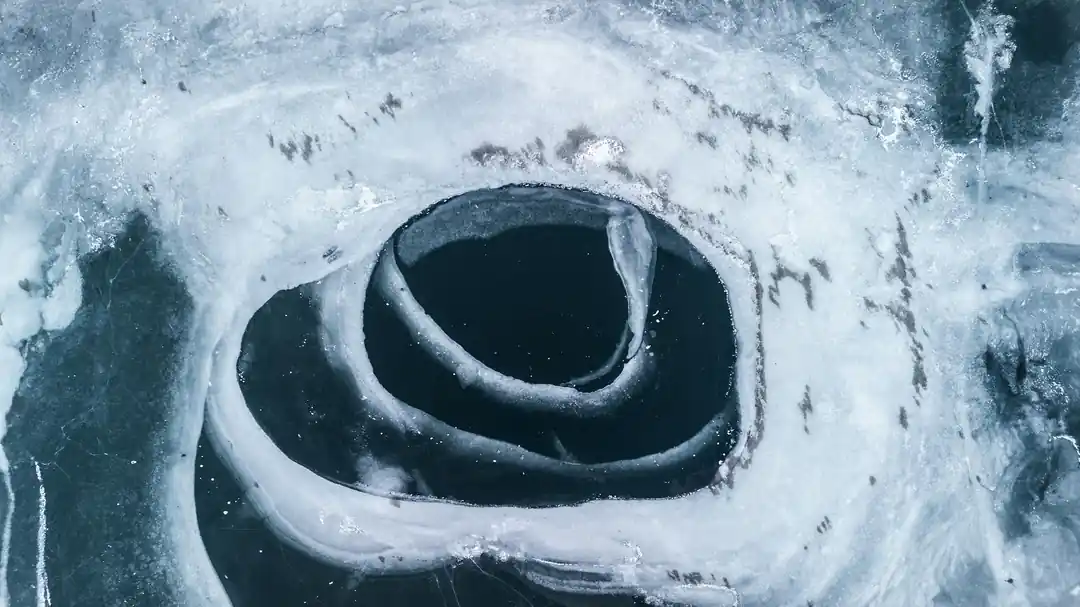
Long before you drill a single hole, you can learn a lot just by observing. The color of the ice is your first and most important clue. Clear, blue, or blackish ice is the strongest. It’s dense, solid, and formed directly from the lake water freezing. This is the gold standard you’re looking for. As mentioned, white or opaque ice is weaker and should be approached with much more caution.
The most dangerous sign is grey ice. A greyish color indicates the presence of water, meaning the ice is thawing and its integrity is compromised. You should never, under any circumstances, walk on grey ice. It’s a clear signal that the ice is unstable and breaking down from within.
Beyond color, look for other warning signs. Avoid areas with visible cracks, seams, or pressure ridges. While some cracks are normal, large or numerous ones are a red flag. Also, be wary of any spot where water is flowing, such as near inlets, outlets, or where a stream feeds into the lake. Moving water inhibits freezing and creates dangerously thin spots. The same goes for areas around logs, rocks, or dock pilings, as these objects absorb heat from the sun and can rot the ice around them.
The Moment of Truth: How to Actually Test the Ice
Observing is one thing, but you can't know the thickness for sure without measuring it. Never trust that the ice is uniformly thick. It can vary dramatically from one spot to another. The only way to be safe is to check it yourself as you go.
Start near the shore and drill your first test hole. The best tools for this are an ice auger (a large corkscrew-like drill) or a spud bar (a long, heavy steel chisel). A cordless drill with a long, 5/8" wood bit can also work in a pinch. Once you've punched through, you can use a simple tape measure to check the depth. Hook the end of the tape on the bottom edge of the ice to get an accurate reading.
Don't just check once and then march confidently to the middle of the lake. As you venture further out, you should continue to drill test holes every 150 feet or so. It might seem tedious, but it's the only way to ensure you're on solid footing for your entire journey. It’s a small price to pay for peace of mind.
Finally, remember that safety is a team sport. Never go out on the ice alone, and always tell someone your plans. Carry a pair of ice picks, which you can wear around your neck. They are inexpensive and can be a lifesaver if you fall through, allowing you to grip the ice and pull yourself out. Taking these simple precautions ensures that your beautiful day on the ice remains just that—beautiful.
You might also like

Don't Freeze: The Ultimate Guide to What to Wear for the Northern Lights
Chasing the aurora is a dream, but it can turn into a nightmare if you're cold. Here’s exactly how to layer up to stay warm and comfortable while you watch the magic happen.

Your Ultimate Guide to Planning a Large Party: A Stress-Free Timeline
Ever feel overwhelmed by the thought of hosting a big bash? Trust me, you're not alone. This guide breaks down large party planning into manageable steps, so you can actually enjoy the process and the celebration itself.

Beyond the Title: Unlocking the Leadership Skills That Truly Build Great Teams
Ever feel like you're just managing tasks instead of leading people? Let's get real about the skills that transform a group of individuals into a powerhouse team.

The Future of Money is Already Here: 4 Fintech Trends You Can't Ignore
Ever feel like the way we handle money is changing at lightning speed? You're not wrong. From AI advisors to finance that's baked right into your favorite apps, let's break down the biggest shifts in fintech.

The Winter Commute: Can You Still Count on Public Transit in a Snowstorm?
When the world turns white, getting around feels impossible. But is public transportation still a reliable option? Let's dive into how cities keep moving and how you can navigate the system safely.